
Overview
Local deployment
Setting up a Galaxy server on your own laptop or desktop server is fairly straightforward by now and the Galaxy wiki has excellent documentation if you are running Linux or MacOS. What’s more, the Galaxy Toolshed allows you to deploy additional tools and software in a plug-and-play approach. This should be perfectly fine for smaller analytical tasks; comparing a small number of RNA-seq samples or running a handful of exome-seq data sets is very much feasible.
In the cloud: Cloudman
Eventually you will be involved in projects that you can no longer realistically handle on a desktop server. Other than working with your IT team to deploy a Galaxy server locally your best option is to make use of Amazon’s AWS environment. CloudMan, the Galaxy version we have been using during this course, can now be set up very easily through BioCloudCentral. This gives you access to a main Galaxy server of your choice, and you can add additional worker nodes through CloudMan’s administrative interface to speed up the data processing even further.
1. Signing up for AWS
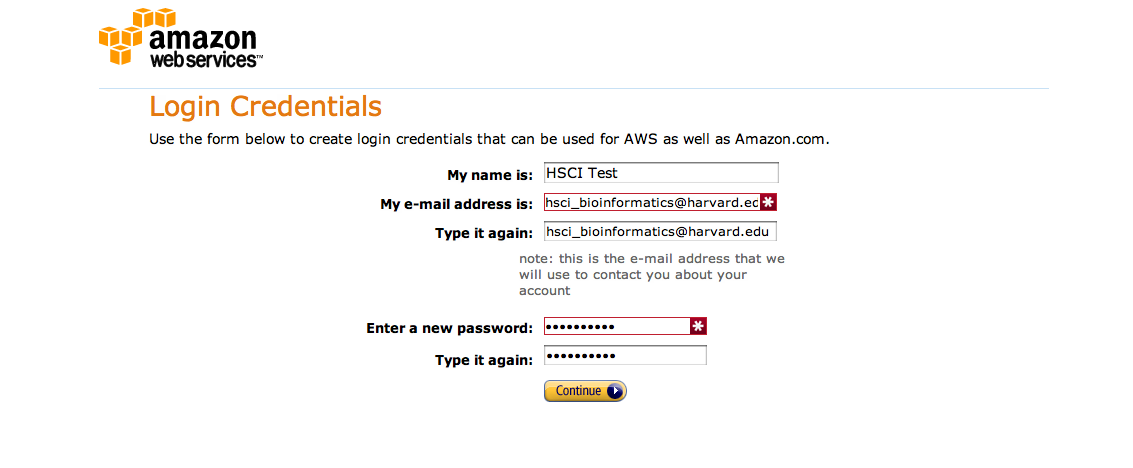
In order to sign up to AWS you will need a credit card, an email account – ideally your work email – and a phone. Navigate to the AWS signup page and click on Sign Up. In the following screen provide your email address and select I am a new user. Finally, decide on an AWS user name and a password. Note that this is your AWS account password and should be independent from any other password you use, including the password you will pick later on to log into your own Galaxy server:
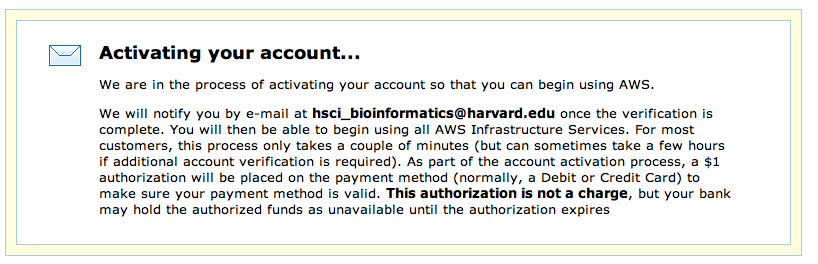
Work your way through the remaining forms which include signing off on the AWS Customer Agreement and click on Create Account and Continue. You will now need to provide credit card details. You will be charged $1 as a test of the card, but otherwise no charges occurr until you actuall start a server. To confirm that you actually authorized the account creation work through the authorization process; this is usuall done via phone: provide a phone number, wait for the call, enter the PIN displayed on the webpage. Your account will now be validated:
You will receive a confirmation email from Amazon at which point you can log in:
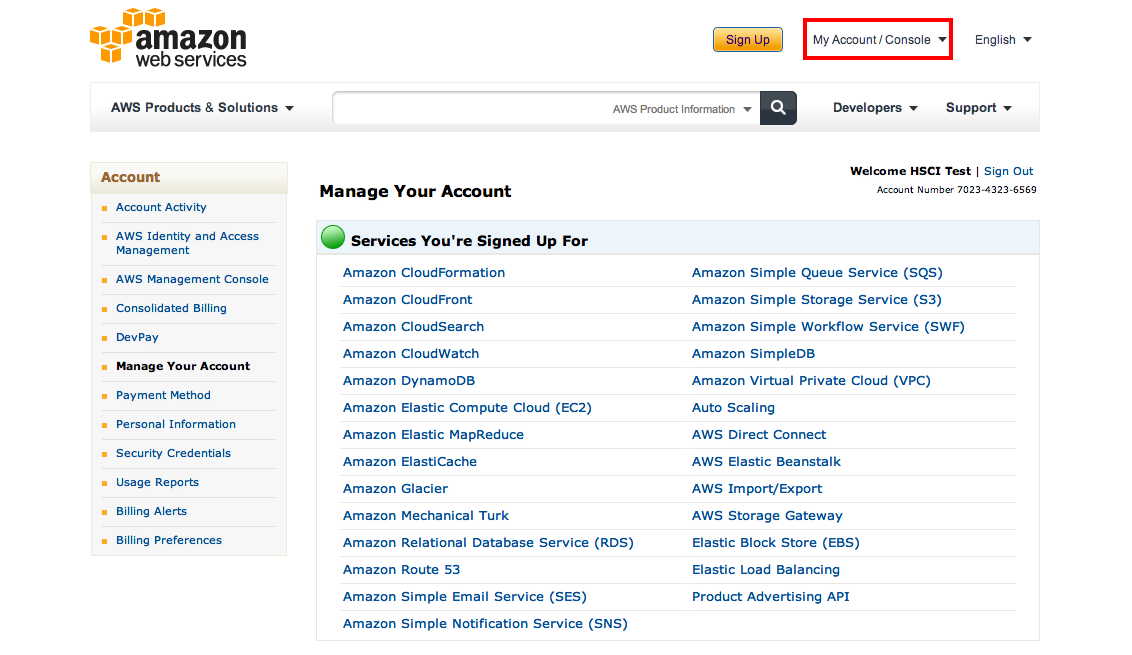
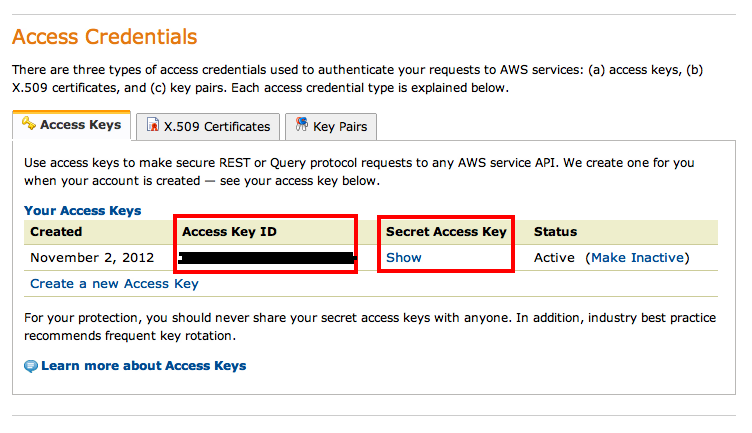
Now you are almost done. Go to My Account / Console and find Security Credentials. On the following page find the Access Credentials section which should list your active account along with an Access Key ID. Note it down, then click on Show underneath the Secret Access Key. Copy and paste that to a text document as well, you will need both to start your own Cloudman instance:
2. Starting Cloudman
BioCloudCentral dramatically simplifies the process of starting Cloudman, but it does require some basic information to be filled in:
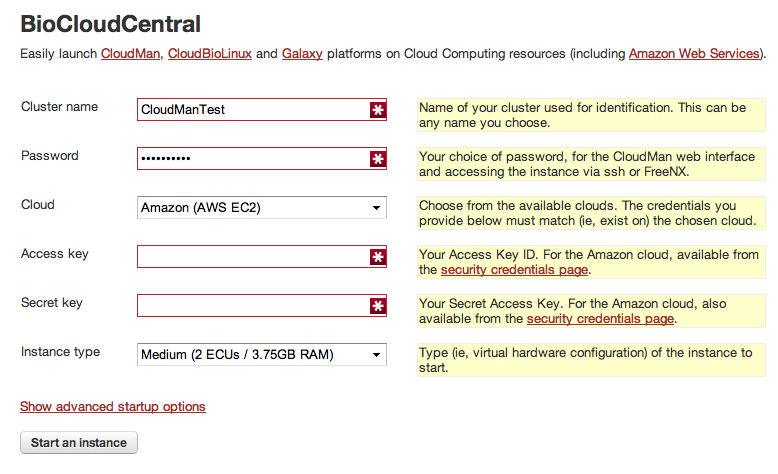
To start with you need to provide:
Cluster name: Pick any name you like. If you shut down your server at the end of your project all data will be saved and associated with this name unless you ask for it to be delected. If at some point you need to continue with your project you can continue where you stopped by providing the same cluster namePassword: Pick a password. This will be needed to log into Cloudman and should be different from your AWS passwordCloud: Leave to the defaultAmazon (AWS EC2)Access Key: Cut and paste the access key from your AWS account pageSecret Key: Cut and paste your secret key from your AWS account pageInstance type: This determines the server size (CPUs, memory, etc.), but also your cost. Start with theMediuminstance; you can always add more worker nodes once Cloudman is up and running
Next, click on Show advanced startup options, click on the little blue arrows next to Placement and wait for the field to populate. From the dropdown menu pick ``

If you now click on Start an Instance BioCloudCentral will get to work and provide you with a link to your own Cloudman instance after a minute or two:

3. Configuring Cloudman
Clicking on the IP address link will take you to your new server; use the user name and password you just set up to log in. Cloudman will ask you how much storage space to set aside to begin with as part of the Galaxy Cluster option:
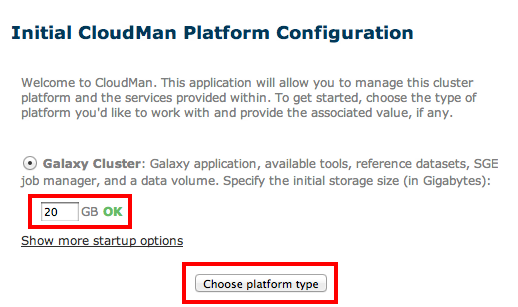
About 20-30GB should get you started, and you can always increase this later on. Clicking on Choose platform type should launch the system. If all you need is access to your Galaxy environment, wait until the Applications and Data status lights turn green and click on Access Galaxy – you are all set.
If, instead, you would like to use the data from our workshops there is an easier way than downloading everything to your local machine, then uploading it to AWS. We have created a ‘shared image’ which has all the data, published histories and workflows for you to explore. Rather than entering the amount of storage required pick ‘Show more startup options and find the Share-an-instance Cluster field. In this field, cut and paste the following string which identifies the workshop data file:
cm-acd17b4674b4fa6291f5fd0736de8e8d/shared/2012-11-02--19-47/
Note: This instance is currently out of date and may not be available at the time of this writing. We are in the process of creating a current version.
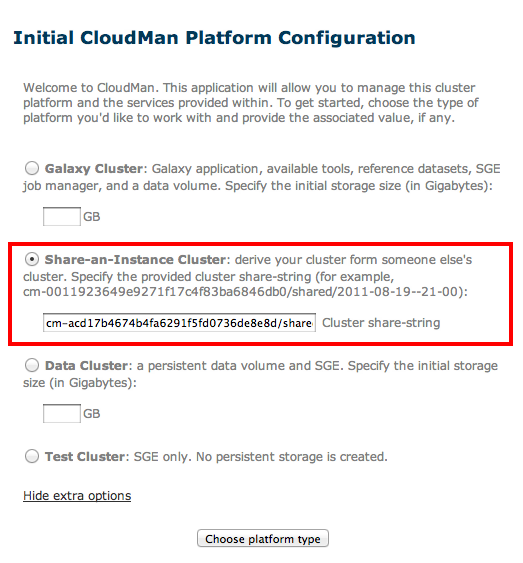
As before, click on Choose platform type. The Galaxy instance that now launched will be pre-populated with all data used in the course, including shared histories and workflows.
4. Using Galaxy on AWS
We strongly recommend you work through the Cloudman Wiki to get a better understanding of how to increase the storage size, add additional CPUs (worker nodes), etc. If you want to learn more about AWS in general the UC Davis Cloud Computing course is very much worth the time investment.
Note that now that Cloudman is running it automatically enables an FTP account associated with your instance, allowing you to transfer larger data files straight into your user account; in particular, files larger than 50-100MB tend to be difficult to upload using a regular web browser.
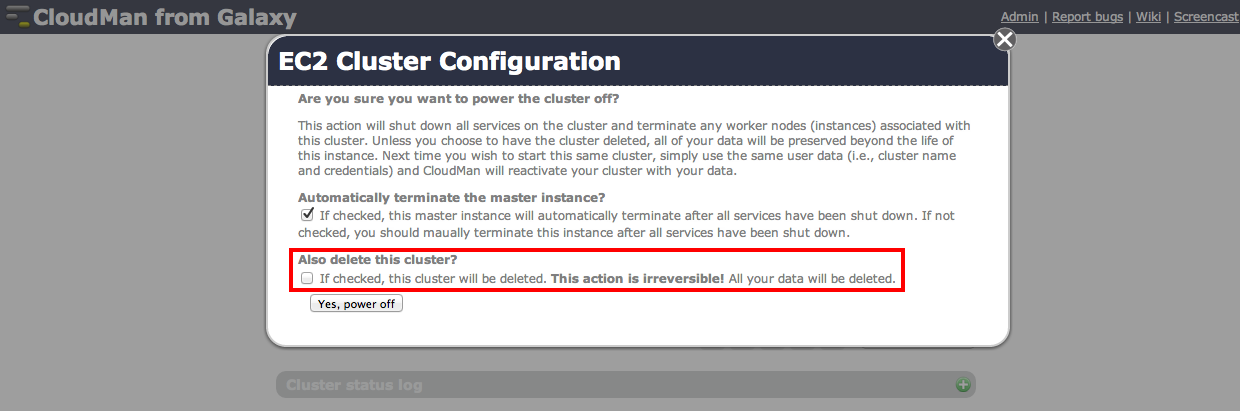
Remember to shut down your cluster once you are done with the analysis. This will minimize incurred costs though you still will have to cover the storage charges. In return this allows you to come back at any time and re-start the Galaxy instance (as long as you give it the same name) which will resume with all your data, workflows and histories in place:
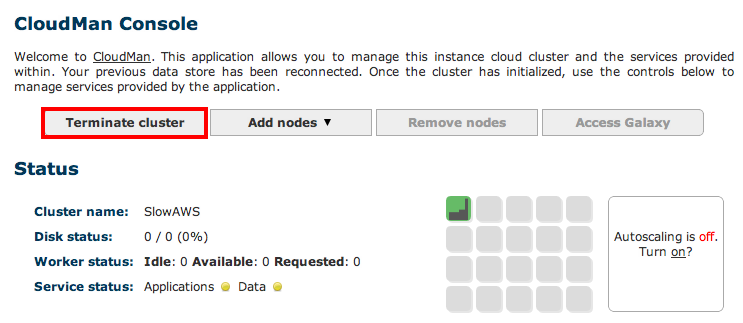
Important: If you decide to save a snapshot of your data – which is the default option – your credit card will get charged for storage cost of your data. If you would like to avoid these costs you will need to download all data to your local system, then select the Also delete the cluster? option.
Cost
A number of AWS cost calculators exist, but for bioinformatics data analysis your main contributes are going to be the overall CPU hours and the long-term storage cost of very large NGS data sets. Start with a small data set and some basic analysis to monitor your cost. Also take a look at Cloudman’s capacity planning summary.